Outlook Calendars and Microsoft Teams Integration
Outlook Calendars and Microsoft Teams Integration
PrintPushFar's Outlook Calendars and Microsoft Teams integration options enable participants to seamlessly schedule meetings within PushFar, whilst checking whether their respective mentor or mentee (or alternative phraseology) participant is free or busy and enable the option of generating a Microsoft Teams meeting link type too.
The first option, Outlook Calendars, requires just Calendars.Read as an option. This can share free/busy and potentially conflicting times with an individual's respective mentor or mentee.
The second option, Microsoft Teams, requires Calendars.ReadWrite and OnlineMeetings.ReadWrite.All permissions in Azure AD Application Permissions. When a meeting is requested, participants will receive into their Calendar the meeting, once the requested participant accept or decline the meeting on PushFar platform, it will reflect into Outlook calendar as well. If one of the participants cancel the meeting, it will be removed from both participants calendars.
1. Access your Azure Active Directory tenant and go to “App Registrations”.
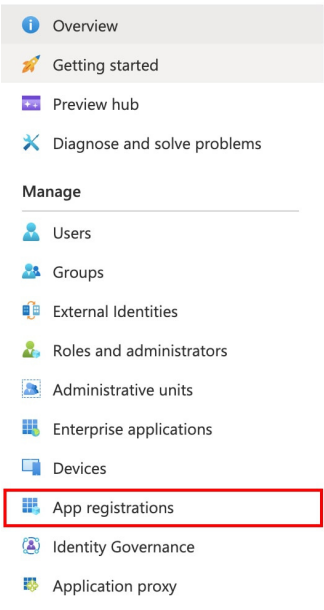
2. If you already setup SSO for our app you will find the application in “All Applications”, otherwise click on New Registration and setup a new “PushFar” Application:

3. Open “PushFar” Application from App Registrations and click on API permissions.
4. Click “Add a permission”:
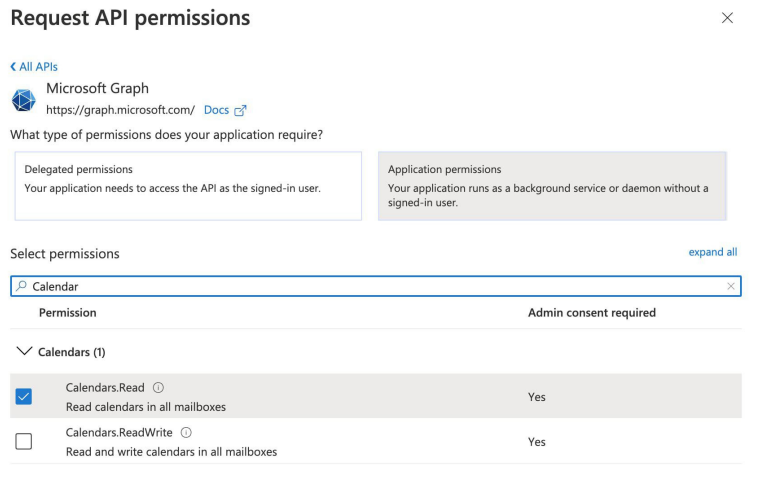
5. Under “Microsoft APIs” select “Microsoft Graph”:
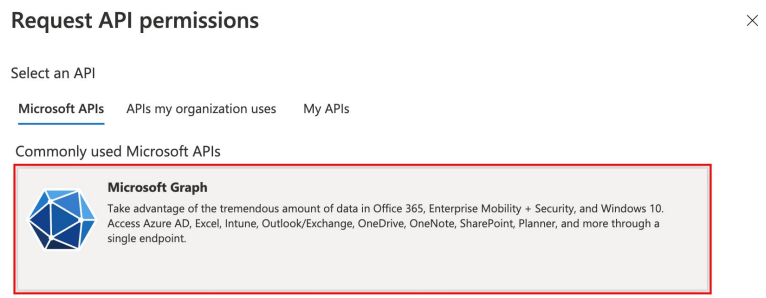
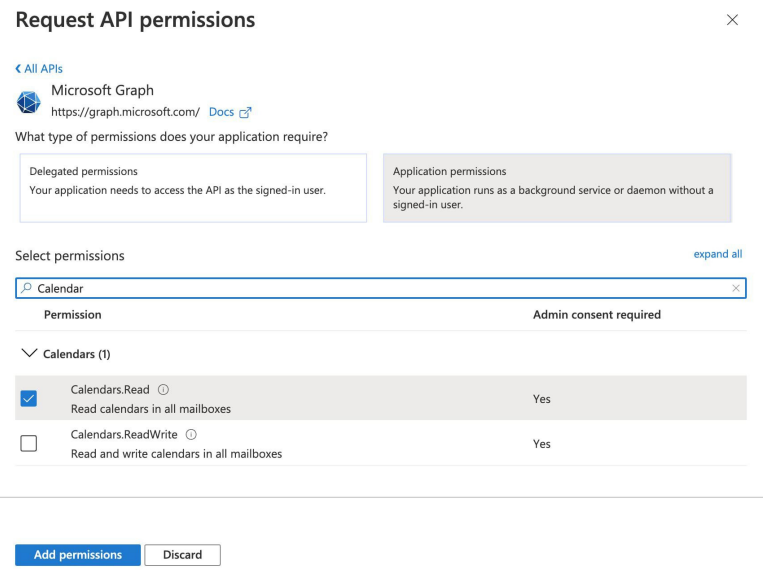
6. Select “Application permissions”. Search for “Calendar” and tick the “Calendars. Read” then click “Add permissions”:
7. Click on “Certificates & secrets” in the left-hand menu.
8. Click “New client secret”.
9. Add a description, select an expire date for the credentials and then click “Add”.
10. Select “Application permissions”.

11. Click on “Overview” in the left-hand menu.
12. Here you will see the Client ID and Tenant ID:
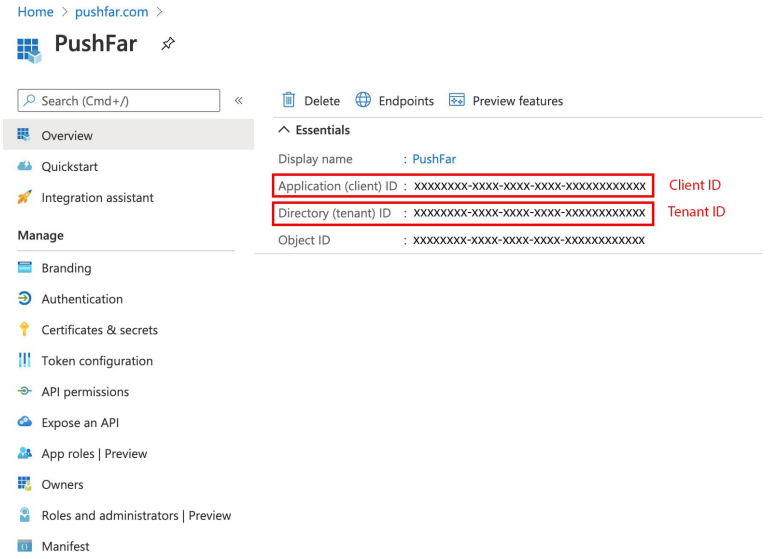
13. Place the Client ID, Client Secret and Tenant ID into PushFar’s admin panel and click ‘Save Configuration’ to complete the process.
.png?width=100&height=75&name=Untitled%20design(1).png)