.png?width=100&height=75&name=Untitled%20design(1).png)
Settings page overview
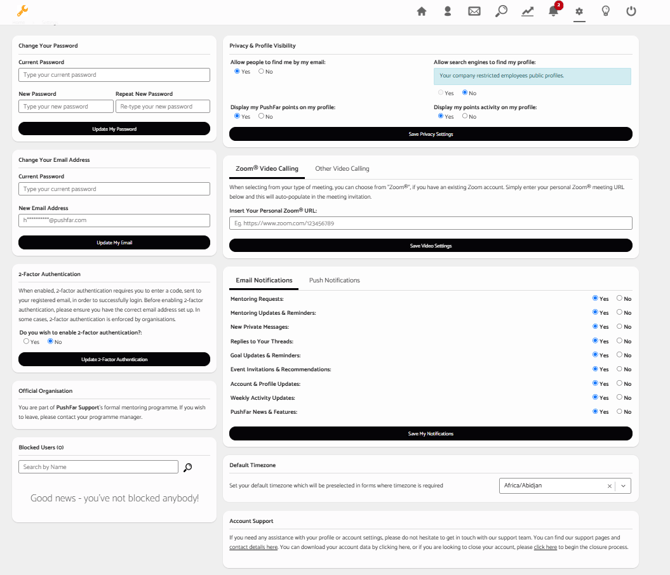
Whether you are a mentor, mentee, or both, the Settings page allows you to manage your account preferences, security, privacy, notifications and other personal settings.
To access the page, select the Settings cog icon in the top-right corner of your PushFar dashboard.
From the Settings page, you can:
- Change your password
- Update your email address
- Manage your privacy and profile visibility
- Enable Two-Factor Authentication
- Configure your video calling preferences
- Manage email and push notifications
- Set your default timezone
- View and manage blocked users
- View or request access to an official organisation
- Download your account data
- Get account support or close your account
Please note: Some features may be restricted, disabled or managed by your organisation’s administrator.
Please note: Some features may be restricted, disabled or managed by your organisation’s administrator.
Changing your password
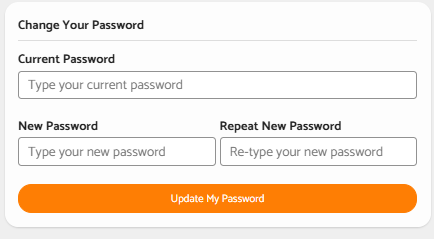
You can update your PushFar account password from the Change Your Password section.
To change your password:
- Enter your current password.
- Enter your new password.
- Enter the new password again in the Repeat New Password field.
- Select Update My Password.
Make sure the two new password entries match before saving your changes.
Make sure the two new password entries match before saving your changes.
Changing your email address
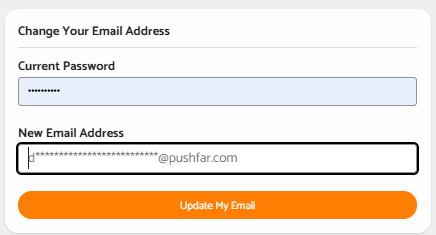
You can change the email address linked to your PushFar account from the Change Your Email Address section.
To update your email address:
- Enter your current password.
- Enter your new email address.
- Select Update My Email.
Your updated email address will be associated with your PushFar account.
Privacy and profile visibility
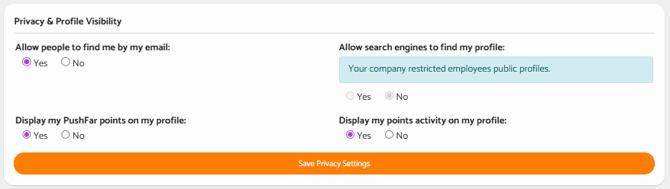
The Privacy & Profile Visibility section allows you to control how other people can find and view your profile.
Depending on the settings available to you, you can choose whether to:
- Allow people to find you using your email address
- Allow search engines to find your profile
- Display your PushFar points on your profile
- Display your points activity on your profile
Select Yes or No for each available option and then select Save Privacy Settings.
Please note: Your organisation may restrict certain privacy options. If a setting has been managed by your organisation, a message will appear within this section.
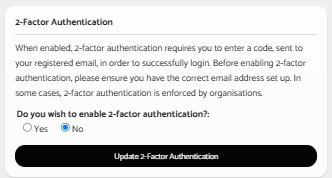
Two-Factor Authentication
Two-Factor Authentication, also known as 2FA, adds an extra layer of security to your PushFar account.
When enabled, you will need to enter a verification code in addition to your usual password when signing in.
Before enabling 2FA, check that the email address registered to your account is correct and that you can access the associated inbox.
To enable 2FA:
- Find the 2-Factor Authentication section.
- Select Yes.
- Select Update 2-Factor Authentication.
- Follow any instructions displayed on the screen.
To disable 2FA, select No and save the change using the same button.
Please note: Your organisation may enforce this option preventing you from changing this option.
Video calling settings
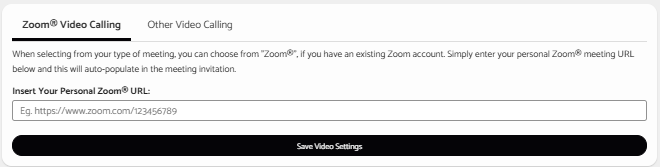
Mentors and mentees can save a personal video meeting link in their settings. The saved link can then be automatically included in meeting invitations when arranging mentoring sessions through PushFar.
Using Zoom
To add your personal Zoom meeting link:
- Select the Zoom Video Calling tab.
- Enter your personal Zoom meeting URL.
- Select Save Video Settings.
Using another video calling platform
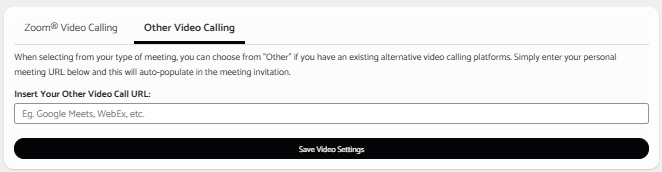
You can also save a personal meeting link from another video calling platform.
To do this:
- Select the Other Video Calling tab.
- Enter your personal meeting URL.
- Select Save Video Settings.
This can be used for platforms such as Microsoft Teams, Google Meet, Webex or another video calling service that provides you with a personal meeting link.
Managing email and push notifications
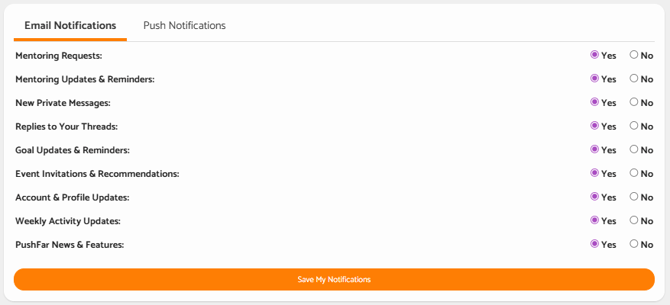
You can choose which notifications you would like to receive from PushFar.
Separate preferences are available under the Email Notifications and Push Notifications tabs.
Available notification categories may include:
- Mentoring requests
- Mentoring updates and reminders
- New private messages
- Replies to your threads
- Goal updates and reminders
- Event invitations and recommendations
- Account and profile updates
- Weekly activity updates
- PushFar news and features
To update your preferences:
- Select either Email Notifications or Push Notifications.
- Select Yes or No for each notification category.
- Select Save My Notifications.
Remember to save your changes separately within each tab.
Setting your default timezone
Your default timezone helps PushFar display the correct times when you are scheduling mentoring meetings, completing forms or viewing time-based information.
To update your timezone:
- Find the Default Timezone section.
- Open the dropdown menu.
- Search for or select the appropriate timezone.
The selected timezone will be pre-selected in areas of the platform where a timezone is required.

Managing blocked users
If required, you can block another PushFar member.
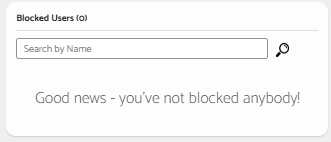
The Blocked Users section allows you to:
- Search for a member by name
- View people you have previously blocked
- Manage your blocked users
If you have not blocked anyone, the section will confirm that there are currently no blocked users on your account.
Joining or leaving an official organisation
The Official Organisation section displays information about your connection to an organisation or formal mentoring programme.
If you are using PushFar through the Open Network and would like to join your organisation’s official PushFar platform or mentoring programme, you may be able to submit a request from this section.
The request must be reviewed and accepted by your organisation’s administrator before access is granted.
If your account is already connected to an official organisation or formal mentoring programme, this section will display the relevant membership information. Where applicable, you may need to contact your programme manager if you wish to leave.
Getting Support & Managing Your Account
The Account Support area provides access to additional support and account management options.
From this section, you can:
- Access PushFar support pages and contact details
- Download a copy of your account data
- Begin the account closure process
Downloading your account data
To download a copy of your account data, select the relevant clicking here link within the Account Support section and follow the instructions displayed.

Closing your account
If you would like to close your PushFar account:
- Scroll to the Account Support section.
- Select the click here link relating to account closure.
- Follow the on-screen instructions to begin the closure process.
Closing your account may affect your access to mentoring connections and other information associated with your profile. Review the information shown during the closure process before proceeding.
Need further help?
If you experience any problems with your settings or need assistance with your mentor or mentee account, contact the PushFar Support Team by emailing support@pushfar.com.
The team can help with:
- Account access and login problems
- Password or email address queries
- Profile and privacy settings
- Notification preferences
- Organisation membership requests
- Mentoring programme enquiries
- Account data or closure requests
- General platform support